New posts on: mymacrotips
I want to share with you the tricks for taking macro photos with my mobile phone that I have discovered through trial and error. A lot of trials, a lot of mistakes and above all, a lot of patience.
Here you can access a first guide, which is also available on Instagram.
Yes, there are mobile phones with macro mode.
Among the different models from brands such as Samsung, Oppo, Xiaomi, Motorola, Nokia and now iPhone, there are models that have a "macro mode" and even have specific cameras. With them you can get spectacular results, although they have their limitations, especially in terms of focusing distance. For me it was a surprise that my old Lumia 640 (Nokia with Windows Phone) which only had a single main camera could take great macro shots, like the butterfly below.
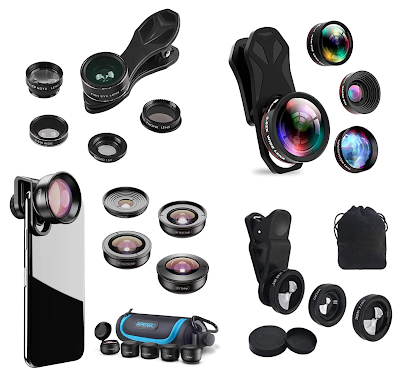
If you buy a kit, keep the macro and throw the others away.
Well, don't throw them away, keep them in a drawer just in case. In sales photos, a kit made up of several lenses looks very striking, and even more so at an attractive price. But it is very rare that you get to use a lens that is not a macro. I never use "fisheye", "wide angle" or "telephoto" lenses, because they are a one-day toy. In fact, if I buy a kit consisting of macro and wide-angle, I do so knowing that the wide-angle will end up in a drawer. The price is usually justified by the quality of the materials, such as quality glass lenses mounted on aluminium instead of resinous composites and plastic. A "real" photographer would laugh at the prices that seem expensive to me, i.e. more than 40-50€.
Try different types of lenses.
Don't hesitate to try lenses that are within your reach: from old binoculars, from a thread counter, from a pocket magnifier... I always carry with me -because it fits in my small trouser pocket- a lens that I took apart from some second-hand binoculars from a flea market and that I hold with a simple rubber band. And I have achieved better results with it than with most smartphone-specific lenses. Of course, not all of them will work, and you need to check what focusing distance they require - for your smartphone camera - before you go to the trouble of figuring out how to make a homemade attachment to attach them to your phone.
More magnification is not always better.
Cheap clip-on lenses (€5-15) can magnify a lot even if they generate distortions and aberrations in the image. There are better quality lenses, also with high magnification and with better results, but both these and the previous ones have a problem: a very short focusing distance, with which you only get a sharp image if you get very close to what you want to photograph. Insects don't like it if you bring your phone within one or two centimetres of them.
Correct focus is essential.
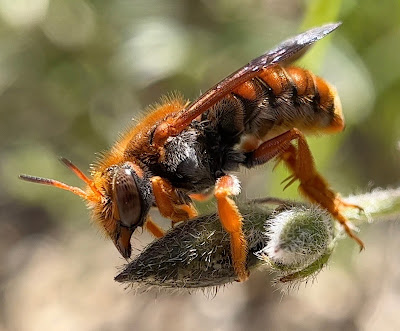
It is important that small details are sharp, but the closer you have to get to the subject you want to photograph, the shallower the depth of field will be. So for example, for an insect seen from the front, you might see the head out of focus, the torso sharp, and the abdomen a blur. With lower magnification and closer focus the depth of field will be greater and more areas of the image will be in focus. For this reason, there are manufacturers like Apexel, who offer the "2 in 1 Clip-On Lens Kit", with a 12X Macro and a 24X Macro, to use one or the other depending on the case.
But the blur is also...
As we have seen, in macro photos there is an almost inevitable effect: the main subject appears in focus, but everything a little further away - or too close - appears out of focus. And this, far from being a defect, is what gives these photos their special charm. Some out-of-focus backgrounds can be very beautiful even when you can't see what makes them up. Light reflecting off flowers, leaves or drops can create a beautiful bokeh effect.
Movement is a problem.
Photographing beetles is usually straightforward, but other insects are always moving. You can follow the almost linear movement of an ant, but the oscillating flight of a bee is very difficult to follow and keep in focus, especially when the magnification is high and it constantly moves out of the field of view.
For this reason, it is sometimes more practical to use lenses that, although they magnify less, their longer focusing distance does not require you to get as close and offer a larger field of view. There are lenses (Apexel Macro 100mm or the Mugast Macro 100mm...) that are more expensive than the average, but have a longer focusing distance than usual, and allow you to shoot a macro photo from a distance of 4 - 7 cm.
Tripod: yes but no.
If you take photos of textures, drops, plants or inanimate objects, especially if you take them in the kitchen at home, use a small tripod or rest your phone on an object. However, going out to a park or a field and pretending to use a tripod to photograph insects is very optimistic, unless you find a beautiful spider web with its owner posing statically on it. I always put my tripod in my rucksack just in case, but it is very rare that I get the chance to use it for macro. Translated with www.DeepL.com/Translator (free version)
Use a grip or ring grip.
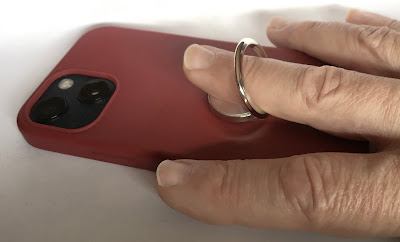
In many cases, in order to get close enough to the object or insect to be photographed, it is necessary to adopt complicated positions, in which it is necessary to lean or hold on with one hand, while with the other you have to hold the mobile phone and shoot. This leads to blurred pictures and the danger of dropping the phone. To avoid this, one of those folding rings or grips that attach to the case of the smartphone can be useful. I preferred to sew an elastic band to the smartphone case, because it doesn't bother me at all in my pocket and I don't trust something that can come off at the wrong time.
Bluetooth remote shutter release.
Even using a grip, the grip ring or the strap invention, you can move the phone too much when you make the gesture of pressing the camera button on the screen or one of the physical volume buttons. This will cause the photo to be blurred, and to avoid this you can use a remote shutter release or bluetooth shutter button with the other hand.
Take lots and lots of pictures.
With luck, you might get some good ones. Don't delete anything until you can look at them at home with peace of mind. After that, be ruthless and delete without fear. Let a few days go by, and as with travel photos, you'll find that most of them aren't worth it. And if you review them after a couple of weeks, you will end up keeping very few.
Be very patient.
With animals in general, but also with macros of insects, spiders, etc... you have to be very patient. I have chased butterflies for hours to get a photo... that turned out to be useless. If one day you don't get anything worthwhile, don't get frustrated, it's normal. Some other day. And if you manage to do something interesting with a dragonfly and a mobile phone, let me know.
Shoot bursts.
If your smartphone allows it, shoot bursts, and then select the best one or two. This is almost essential if the subject is an animal that is flying or moving a lot. iPhones, in addition to bursts, also take Live Photos, or short animated sequences made by taking several images, which also allow you to select the best one.
Before, measure, focus and block.
BEFORE taking pictures of insects or small reptiles, focus and lock to a specific distance (using a flower as a reference, for example) and THEN zoom the lens in and out of the animal to find the optimum focus. Using manual focus works with flowers, plants and inanimate textures, but you won't have time with moving animals or animals that may run away when they see your phone approaching.
Shoot from different angles.
Shoot from different angles, looking for different compositions. A flower photographed from above can create an interesting geometric effect, but with an insect the image is too flat. I usually look for a certain foreshortening, to give more depth to the image. And as we have said before, the background and its colours and shapes are very important even if it is completely out of focus.
A lot of light is necessary.
Look at the different angles at which the light falls. Sometimes the position in relation to the sun makes it unavoidable that you block the light with your own smartphone. I use a little trick: I usually carry a card in my wallet lined with aluminium foil, so that - like a mirror - it reflects the sunlight onto the flower, insect or object from a different angle. A small LED torch could also be useful. If you are accompanied, you can use the torch of another mobile phone. If necessary, use the exposure control offered by most smartphones to avoid overexposed or "burnt" areas due to excessive light.
Don't leave your glasses at home.
This is a no-brainer: if you need "close-up glasses", take them with you when you go shooting. Make sure you see the images displayed by your smartphone perfectly sharp and don't assume that it is automatically focusing well.
Cheat, the pros do it too.
As you might guess, some of the amazing images you see in documentaries have been taken in controlled environments. The animal is forced to pass through certain points, snakes have mice placed within reach, the burrow the camera goes down is recreated in a studio... and terrariums are used.
If photographing or filming a beetle or snail is uncomfortable in the garden or in bad weather, take it home. And you don't need to tie a leg to the poor critter to stop it running around the room; you can make an enclosure with two plates and some water to serve as a film set.
Have fun but enjoy the moment.
In the film "The Secret Life of Walter Mitty" (2013), the protagonist Walter Mitty (Ben Stiller), after a long search, locates the famous photographer Sean O'Connell (Sean Penn) in a remote and inaccessible area of the Himalayas. In the distance, some snow leopards are playing, something beautiful and extremely difficult to see. But despite having his camera equipment set up, the photographer doesn't touch the camera. Aren't you going to shoot?, Mitty asks him in surprise. Sometimes, Sean replies, I don't want the photo to spoil the moment.
So, enjoy the walk, the nature, the sun or the rain, but don't let the photo spoil the moment.


No hay comentarios:
Publicar un comentario